

How to Take Better Photos with Your Phone — Easy Tips To Try Now
Photos are a big part of life — from capturing milestones to sharing daily happenings with loved ones, taking photos has become second nature. Photos tell a story and reveal emotions, which is such a powerful asset in everyday life. And with technology advancing the way it is, taking quality photos has become more and more accessible. Everyone can be a photographer with their mobile phone these days. And believe it or not, in 2023, having great photos will work in your favour. Whether it’s for marketing products or services online or having a strong personal branding online, photos are worth a thousand words or Ringgit, if you’re targeting the right crowd. That’s why, here at Photobook Brunei we’ve compiled some of the tried-and-tested ways to help you get creative and to get that money shot.
Making Full Use of Your Settings

Like we said, you no longer need heavy and expensive equipment to capture great photos anymore. Your smartphone will do just fine. However, depending on the type of smartphone you have, their settings and functions may not be the same. Understanding your camera settings will help you stay ahead of the photo game and get you stunning photos. For example, if you’re shooting outdoors, you may want to set your ISO (the sensitivity of the camera’s sensor) to a low number because it’s already bright, perhaps between 100-400. Contrastingly, shooting at night or dimmed environments require a much higher ISO number. Furthermore, it would also help to familiarise yourself with the rule of thirds, a basic composition rule in photography. Enable this setting on your phone and start framing the key objects at intersecting points and positioning them off-centre, that way you’ll have a well-balanced photo. You could even try on different clip-on lenses for your device to achieve a whole new look or accessories like tripods and ring lights are a great place to start. Having a basic understanding of your device’s capabilities and its key features will leave you with flawless photos every time. Some other common phone camera features include: white balance, shutter speed, and aspect ratios.
Understanding How Lighting Works
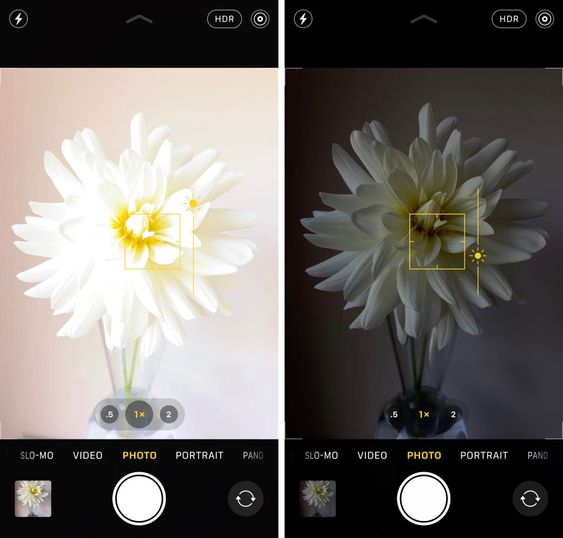
When it comes to photography, lighting is an absolute essential. Photos that are too bright or too dark rarely make the cut. Where possible, always use plenty of natural light to get the vivid colours in your photos. Depending on the look you’re going for, you could always play with soft and hard light to nail the mood of the shot you’re going for. Understanding how to create hard and soft light using a small light source can transform a regular photo into a quality photo instantly. Hard light is a quality of light that casts a harsh and well-defined shadow onto the subject. Soft light or also known as diffused light casts a gradual blend of shadow and highlight. Play around with the distance between the light source and subject, soft light requires the light source to be “bounced” off walls or ceilings, while hard light does not. If you’re going for a more dramatic, sporty, or street look — hard light works best because it showcases that contrast. But if you’re going for something elegant and almost cinematic-like, soft light works well. Switch things up and get creative with the shots you’re trying to achieve. Here’s a tip from pro photographers, wait till the last hour before the sun sets or the first hour after the sun rises to experience “the golden hour” or “magic hour” that promises stunning results.
Choosing Subjects and Backgrounds
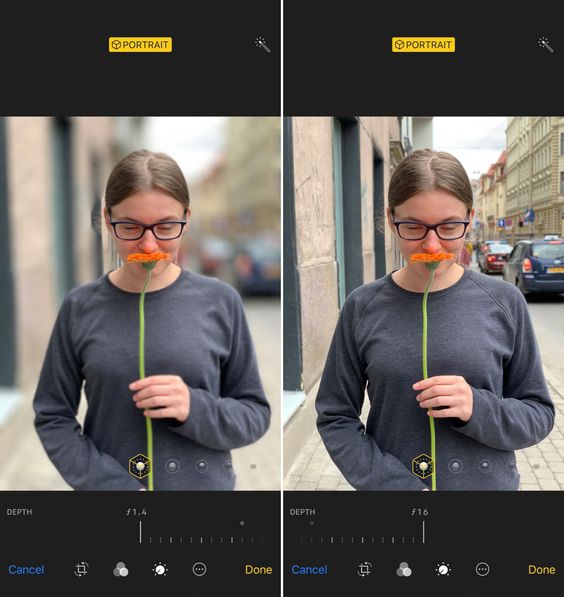
We’re living in the generation of selfies and wefies. Believe it or not, a lot goes into planning the perfect selfie. Some general tips include: holding your phone at a higher angle and as far as possible, shooting in daylight, keeping your poses and smiles natural and not too intense. How about subjects that aren’t human? Go back to the rule of thirds, keeping in mind how colours would look when layered on a specific background. Choosing backgrounds isn’t always the easiest task because it’s hard to imagine your subject in the foreground unless you’re physically present. However, some key things to consider would be to look for backgrounds with minimal distractions so your subject can stand out and be the focal point. Choosing backgrounds with patterns work well too because they create a sense of continuity to the shot, again, allowing your subject to be in the spotlight. If you’re going for something minimalist, seek backgrounds with negative space that allows the viewer to imagine and fully appreciate the atmosphere within the photo. You may want to try exploring with angles too. Let your subject get comfortable in the space and encourage them to move naturally as you capture the flow and expression they exude… which leads us to our next part.
Posing and Directing Your Subject
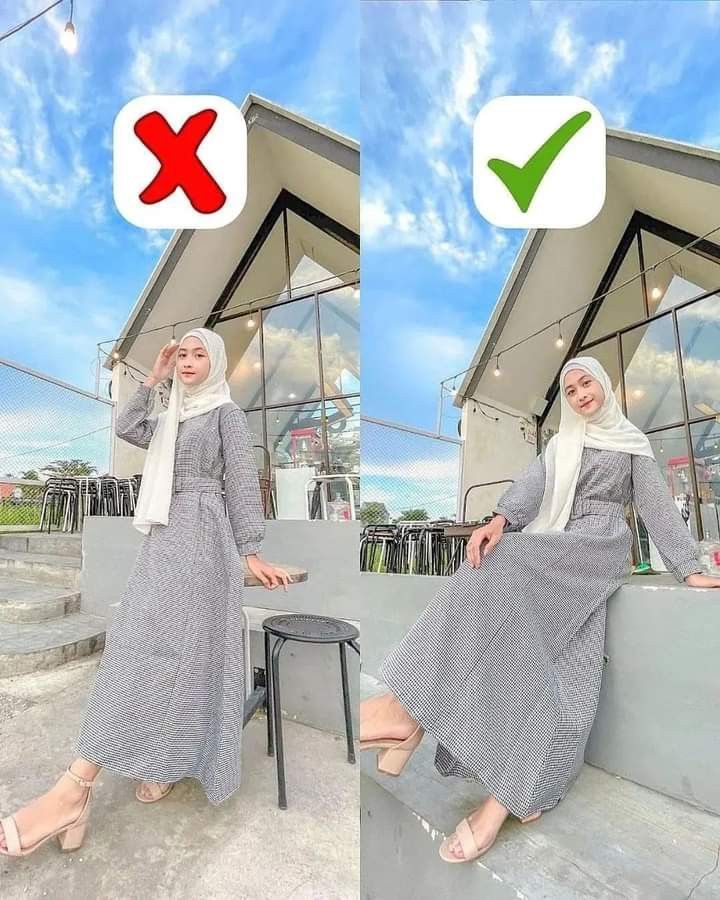
Seeing that most of us aren’t runway models, posing in front of the camera may not be our strong suit. That’s why as the one who’s holding the camera, you’re required to do some directing… yes you! When your subject feels comfortable, that’s when you have the opportunity to capture the best shots. Sometimes, all they need is a little conversation to make them feel at ease and bring out their natural smile. Because when people focus on the conversation and stop worrying about how they look, they’re able to let loose and be natural. Apart from that, you can get your subject to try different poses, incorporating hand and/or leg movements, expressing different emotions, all that good stuff. Ultimately, you want your subject to feel good about the photos you’re taking, so giving them some encouragement in between shots is always a good idea. Also, don’t forget to be clear about your instructions. If you’d like them to move their hand up, tell them which hand, in what direction, and move by how much. Because looking good on camera while trying to digest information and make changes to the poses, is a lot to take in for the average Joe and Jane. After all that work in getting the perfect shot, it would only make sense to bring those photos into the real world through a personalised photobook, one you’ll be able to flip through and savour your best shots. If you want something a little more dainty to fit your notebook, get those shots printed as cute insta prints to remind you of your photography skills and the time you were the camera person.
Tweaking Photos with Simple Edits
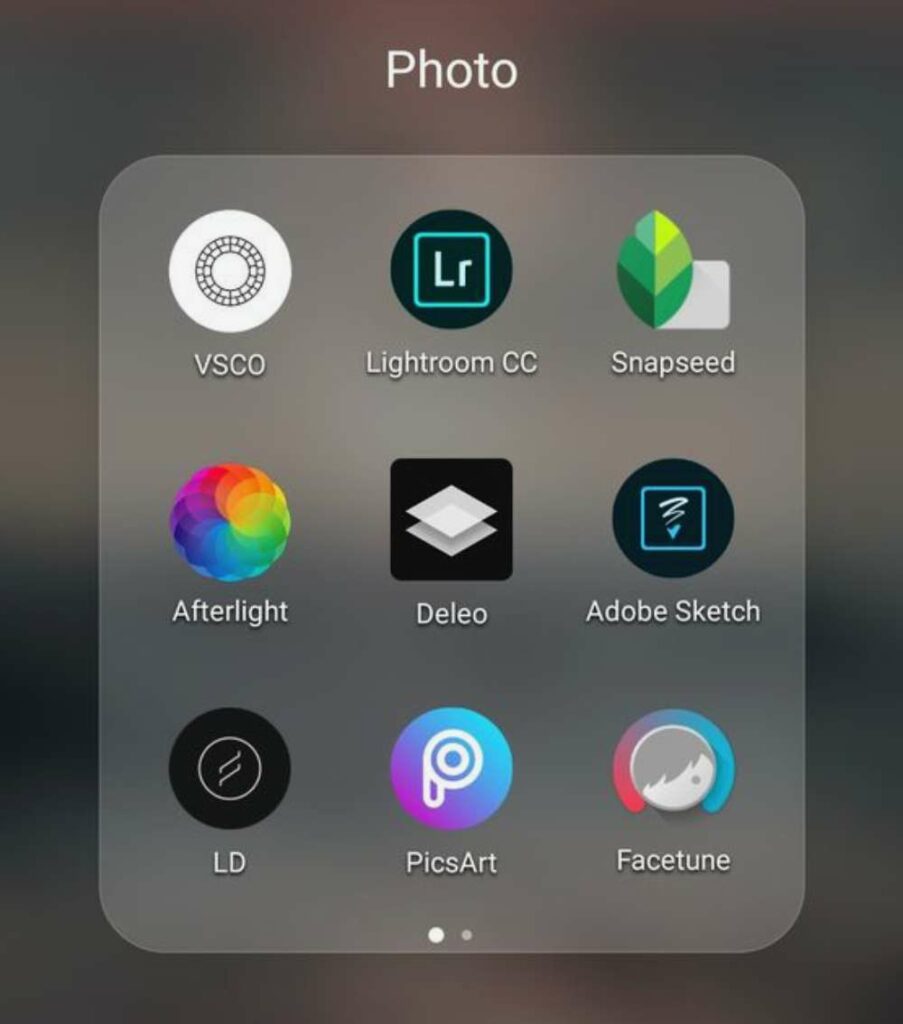
So, you’ve got the photos. All that’s left to do is edit them and they’re good to go. Where to start? Well, here are some basic techniques. Cropping first, if the background is too wide and your subject isn’t the focal point, crop it to achieve the rule of thirds. Next, you’d want to adjust the white balance and colour correction, so your photo doesn’t appear too blue or too yellow. From there, you could look into the vibrancy and contrast of your photos. It will help the intensity in your photos if they are blurred or too faded, which ties in nicely with exposure — too much of it then it’ll be too bright and vice versa. While it might seem like a lot to do, the good news is that there are tons of apps for doing those edits. Some popular ones that many photographers love are Adobe Lightroom, VSCO, Snapseed, and Pixlr.
Practicing and Experimenting
If you’ve read until here, congratulations because you’re all set to take stunning photos! The key to getting better at photography is to practice — doing something consistently often leads to mastery. The more you photograph subjects, the more you’ll notice what poses and backgrounds work and which don’t. Spending time to shoot will give you better insights on what to look out for and how you can make each shot better than the last. In case you’re wondering, is practicing enough? That’s just half of the equation. As much as you should practice, you should also keep your thinking hat on. Experimenting with different backgrounds will put your photography and creative juices to the test. After a while, your subject will feel more comfortable when shooting and you could even incorporate props or have other subjects on set with them. The key is to try new styles and get creative, if something doesn’t work, just switch it up. Remember, a combination of practice and experimentation will lead you down a path of curiousity that will challenge your mind to generate new ideas and concepts. Most importantly, have fun! You know what they say, if you’re not having fun, if you’re doing it wrong!
Start Snapping Right Now

After all the basics we’ve covered, it’s time to put everything into practice. Remember the importance of choosing soft light or hard light, framing your subjects according to the rule of thirds, getting your subjects comfortable in front of the camera and experimenting away! If you feel like you’re not where you want to be yet, just remind yourself that every master was once a disaster and that it’s never too late to start something. There is no secret or cheat sheet to getting better at photography, only to keep at it. Eventually, you’ll find that you have some favourite photos, and if you want to turn them into precious keepsakes for loved ones, check out the endless one-of-a-kind gifting options at Photobook Brunei. It’s a great way to showcase how far you’ve come on your photography journey and make your loved ones happy with thoughtful gifts.